How Do I Return Multiple Items?
Answer
To return multiple items:
- Open the Manage Item Returns page (Fulfillment > Checkout/Checkin > Return Items).

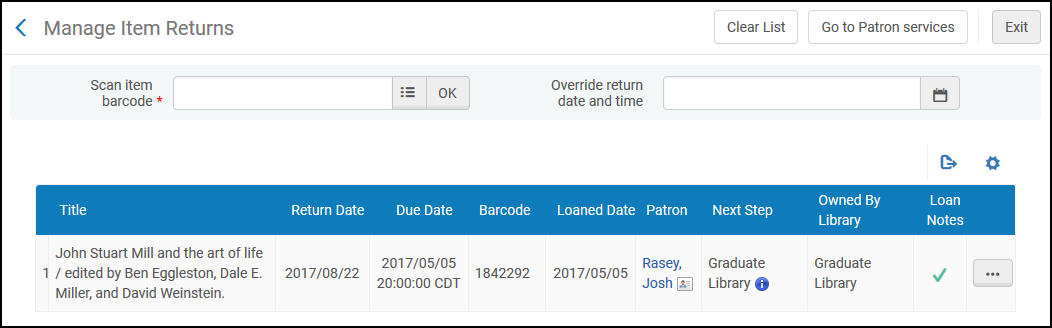
Manage Item Returns Page
If your institution is part of a fulfillment network and has a Circulate For relationship with another institution, an item for that institution may be scanned in from this page as well. In this case, a check box, Item from another institution, will be displayed. Select the check box and select the item's originating institution from the Institution drop-down list.
- Scan or enter the item barcode in the Scan item barcode field, or select
 and select the item from the displayed list.
 - In the Place directly on hold shelf field, select the relevant option, as follows:
- Yes – The item is to be placed directly on the hold shelf. An On Hold Shelf Letter is sent to the patron, indicating that the item is ready for pickup at the hold shelf (see Configuring Alma Letters).
- No – The item is not yet ready for the hold shelf and is to be designated for hold shelf processing (that is, preparing the item for the hold shelf, such as checking the item’s condition). After hold shelf processing is complete, scan the item into the relevant circulation desk. The item is placed on the circulation desk’s hold shelf, and an On Hold Shelf Letter is sent to the patron, indicating that the item is ready for pickup at the hold shelf (see Configuring Alma Letters).
- Select OK. The item details are displayed on the Manage Item Returns page.
Manage Item Returns Page
You can use the following keyboard shortcuts on the Manage Item Returns page:- Alt + Ctrl + L – Opens the patron identification page (see Selecting a Patron)
- Alt + Ctrl + C – Clears the list of returned items
- Alt + Shift + X – Returns to the Alma homepage
- If needed, modify the return date. One reason to modify the return date would be for items that were returned in an overnight drop box during the prior day. The date is modified as follows:
The return date defaults to the current date. The date should only be set to current date or a date in the past.
- On the Manage Item Returns page, select Override return date and time and select the return date and time..
- Select Apply. The return date and time is changed on the Manage Item Returns page.
- If required, select one of the following options from the row actions list:
- Work order – Creates a request; you can select a work order or other request (see step 2 in To create a request:)
- Loan history – Displays an audit trail of an item’s loan history see Viewing Loan History)
- View notes – Displays notes on the loan (see To view loan notes)
- Select Exit to exit the page, or select Go to Patron Services to open the Patron Identification page.